This method, that I will attempt to explain, this time with photos, unlike the disaster which is my Tapestry "yap" page of FB (you can find here) It seemed most people were scratching their heads...Anyhoo, here goes.
* Also, what I am showing is the first time I have done this...I made a few mistakes, and fixed them...read it through before you attempt to do this.
This is what we are trying to achieve...(not the vertical foot loom...ignore that)
I'm not exactly sure what this method is called, but what this method will allow for,
is this:
1. to be able to use almost twice as much of the warp.
2. Much less wastage.
3. Portability, (you could transport weaving from home to Uni, without having to take the whole loom.)
4. Making more out of the equipment you have availabe to you.
First you will need
A loom, frame. This one has tension adjusters at the side, I see no reason why you couldn't use a frame without tension adjusters.
Seine twine, or what ever warp thread you use.
Some dowel rods, cut to the width of your loom
and
PaddlePop (popsical) sticks
Normally, if you were to put on a warp by just wraping it around and around, you could only comfortably weave about half the space inside the loom -eg-15" or 40ish cms.
2. Make a generous estimate of the length of warp you will need, remember you need to tie knots and have enough space to weave. For the sake of this experiment I measured all the way around, just so I knew I would have enough..
3. I put the pieces of measured warp on like this.
 |
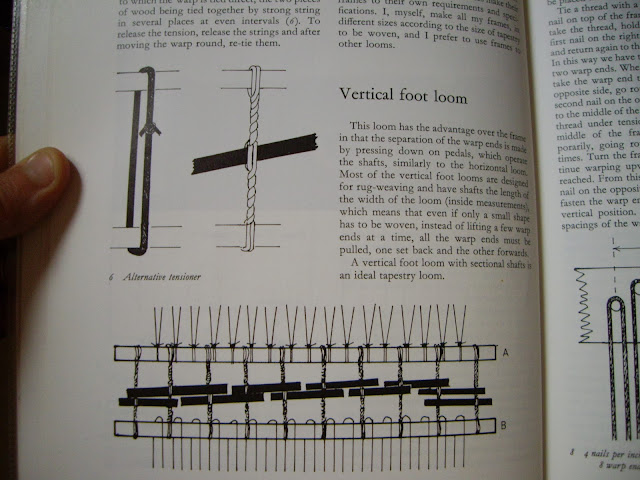
| I think this is called "Larks head". The first photo from the book has the warp just looped over. |
 |
| I measured and worked out how mant groups I needed. I also used tape to secure the groups. |
5. Here you can see, all the warps are now connected to the rod, and I'm about to bring it up, and tie it to the other rod.
 |
| I used hair ties to keep the rods in place while I tied them with some warp. |
I worked evenly over the warp, I think I ended up tying about seven loops
7.To create tension on the warps insert the sticks, and twist...See the first photo to help explain.
When I do this again, I would make my warp a little shorter and the loops connecting the rods a little smaller too, to take full advantage of using this method of tensioning the warp.
I had to make up the difference using the tension device on the loom.
Now to re-tying the warp, in a much more weaver-y way.
With the point of my bobbin, I undid all the stupid knots I did to begin with, and replaced them with these. kind of a reef type knot, that starts at the back, and finishes up on the front of the warps. So much better, and firmer. All the warps have a similar amount of tension...
8.Now that all the warps have been re-tied, loosen the tension a little bit, and push the rods to the bottom of the loom, like this picture above.
9. I have put in the "floor", and begun to weave the "bed". I'm just weaving on the warps on the front surface.
I haven't put in a shed, mainly because I intend to weave over a different amount warp at a time, and I find a shed a bit anoying when I'm doing that. Also if you like to weave with leashes, you can put them on as normal too.
I hope this has been a little bit interesting,
I will keep my reader posted as I eventually get to work on this...I have something else on another loom at the moment.
Cheers
r
x


No comments:
Post a Comment